
Photographing Moths – Some Tips.
We can divide moth photography into two basic types for our
purpose.
2. A more considered, aesthetically pleasing shot to display our catch.
If a beginner can master the first, then the latter will develop too according to taste.
Let me start with saying, I am no photographer. The technicalities are as interesting to me as car mechanics, all I want is a nice photo.
For identification purposes we need to consider some criteria that will ensure our photo can do the job .
- Size. The moth needs to be large enough in the shot to be able to see the markings and details clearly.
- · In focus. As above.
- · Well lit. As above.
- · In the correct position so the relevant features are shown in the image.
Here are some deliberately poor shots I’ve taken based on some real examples over the years.
 |
| Where do I start here. A blurred pot shot with a moth that is clearly in no danger of flying off at completely the wrong angle. |
 |
| Too far away from the camera, in bad lighting. |
 |
| Blurred and from behind, wing markings, shape etc not visible. Ive even had images of a moth from underneath taken through a window! |
 |
| Wrongly angled to get shape and wing patterns... |
I hope you get the idea. Ive seen a lot worse than these too.
So with a little thought and care using the same gear and methods and time it is just as easy to do the moth justice, after all you have gone to the bother of
catching it in the first place.
So –
 |
| You have some moths, now what? |
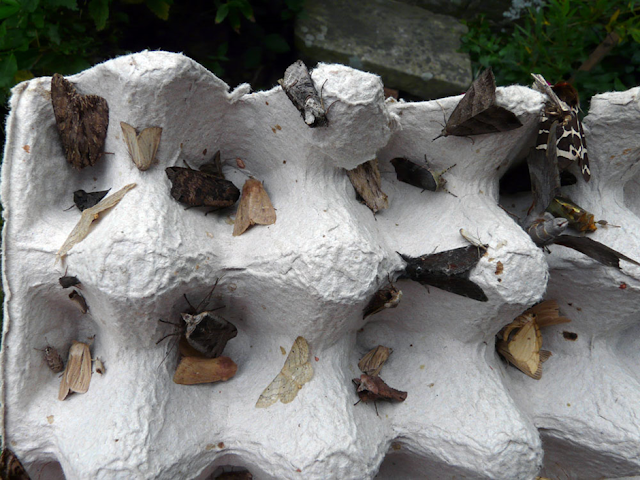
We have some moths. You don’t need to pot them all. The
majority can be identified insitu after some experience. But first a quick scan
to see if any are new or unknown. These need potted first before they fly away.
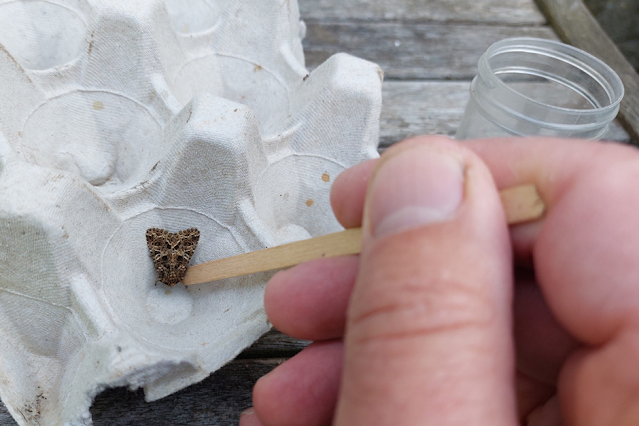
I use a coffee
stirrer to lift the moth from the tray into the pot. It slides nicely under the
legs and the moth climbs on. If it looks more active you might need to put the
pot over the moth then slide it in with the stick. Once in the pot, finish your
count. Keep the pot in the coolest place possible and never in the sun. If you have a few, put the pots in the fridge door, I use the egg spaces. The
moths will quieten down in the cold and can be dormant for a couple of days
without any harm, its as if there is a bad spell of weather outside.
For a record shot I use a piece of roof slate. It is a good neutral grey colour for photography and it can be kept cool, this helps the moth remain dormant. Mine is just kept outside in full shade. You can use anything but make sure it is plain, a neutral tone, not white, black, red or whatever as this makes it difficult to assess the actual colour of the moth. A piece of manageable size can be held and moved into suitable lighting. A unmovable surface cannot. All my photos are taken outside in natural day light, flash gives bad glare I find..
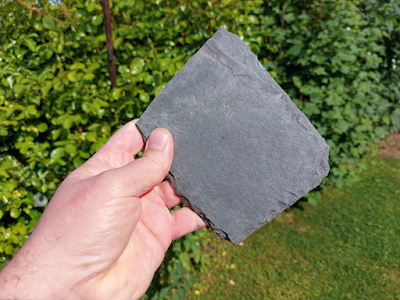 |
| A bit of slate the size of a coaster. It can be angled and tilted to get the best light on the moth . |
Tap your moth out on to the slate. As a guide –
Geometers ie carpets, waves etc are more tricky to care is needed. Its trial and error.
I see photos of moths for id requests at crazy angles.
Basically look in a field guide and that’s the angle to take. Tented moths need
a side shot, flat moths need a shot from above etc. One web page on Google to
show moth photography has some dreadful pics that would be of no use. Carpets
from the side where the only bit in focus is the body, showing no wing pattern
at all! Don't take a head on shot either...unless its a Southern Wainscot.
Composition.
Try to make the image of the insect a reasonable size. Keep
it in proportion. No need for it to be right up to the lens and no need to be a
metre away either. Close enough to see details is what is needed.
And, that’s about it. You can use a phone, a compact camera or an expensive DSLR with macro lens all of them can take perfectly decent usable images. If using a phone position the moth in the screen then tap the screen on the moth image. This will focus and adjust lighting correctly. Then take the shot.
Once you have established these basics, and rest assured it has taken longer to explain and read than to actually take the photo, you might want to go on to get some nice shots of moths in habitat, on a nice mossy twig or a leaf or what ever. Its great to build a collection of the species you catch…
Measurement scale.
If you wish to use a ruler to show moth size, the measurement should be of wing length shoulder to tip, or wingspan. The key is to position the moth first then carefully position the ruler as accurately as you can. Like this -


Finally, these are just my own methods, everyone will do their own thing, but if you are just starting out, this will get you usable images. Enjoy.
 |
| The same moth as in image one above, taken using a phone, this time all id features are visible. |
.jpg) |
| This time on the slate, taken with a DSLR and macro lens as was the one below on a nice stick.. |
.jpg)
 |
| Again, this is the same moth as in image 2 above. This time closer and at the right angle using my phone. |
 |
| Above, Taken with DSLR and macro lens. |
 |
| Same moth as image 3 above, much closer correct angle taken with my phone.. |
 |
| On a leaf, taken with DSLR and macro lens. |
 |
| You guessed, this is the moth in image 4 above. Not on the slate, still on the coffee stirrer but the image of the moth is clear to see all features. |
 |
| With a DSLR and macro lens. |


.jpg)
6 comments:
Many thanks appreciate the advice
Very useful. thanks.
I find that a soft artist's paint brush can be very useful for coaxing a moth into a pot. Also, especially with Noctuidae, you can often get it to spread its wings, allowing a view of the underwing (which can help with the ID in some cases).
Great tip about using a slate as the background. My photos are much improved using this.
I use a tail feather from one of my chickens. Means the broader moths don’t fall off. Will def try the slate.
I tend to use the tail feather from one of my chickens as it helps reading out those buried in nooks and means the broader moths don’t fall off.
Post a Comment